How Do I Screenshot On My Mac?
- Apr 25,2017 | Use Tips for Mac
- By Admin

As a MacBook Pro user, I think you should know how useful to use keyboard to capture your screen, I use the Command-Shift-4 method frequently to take a screenshot of a selection of my desktop, but there is different way if you want to take a screenshot in different situation.
Best of all, capturing your screen is super simple to do when using a Mac, and we’re happy to show you how to do it!
Here are a number of different, straight-forward ways to screenshot on your Mac!
- How screenshot the entire screen
- How screenshot part of your screen
- How screenshot a specific Mac app window
- How to screenshot to your Mac Clipboard
How to screenshot your entire screen
1.Open all the apps and windows you want screenshot, and arrange them show the way just exactly you want to see them screenshot.
2.Press Command + Shift + 3 on your keyboard at the same time.
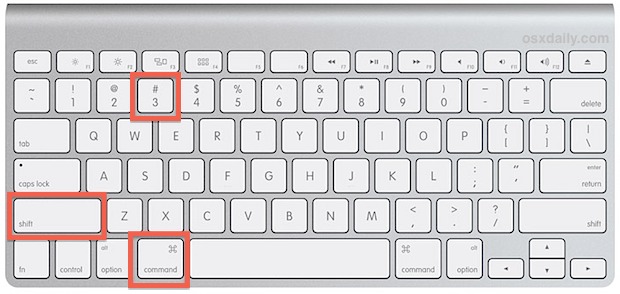
3.After hearing a sound camera clicking and your screenshot will appear on your desktop in .PNG format, with the title Screen Shot [Date + Time].
4.Now the entire screen has been saved, double click on the screenshot to open and share it with Preview.
How to Screenshot Part of Your Screen
1.Open all the apps and windows you want screenshot, and arrange them show the way just exactly you want to see them screenshot. (like above 1)
2.Press Command + Shift + 4 on your keyboard at the same time.
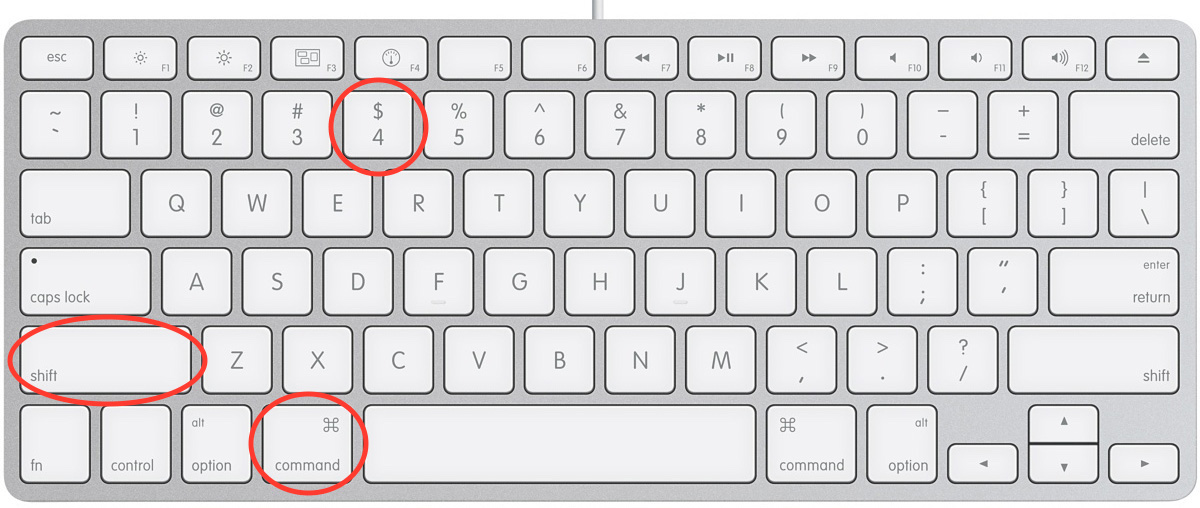
3.Set up the new crosshair cursor at one corner of the area you want to capture (for example, top right), and click and hold.

4.Drag the crosshairs to the opposite corner wherever you want (for example, bottom right).
5.The crosshairs give you a precise pixel count if you want a specific size (you can adjust the size in ideal). Hold down Option to change the lock point to the center of the area.
6.When you’re ready to cut the area, *let go* of the mouse button or trackpad. Whatever is contained in the outline is what you had screenshot. To cancel, press the Esc (Escape) key before you click.
7.After hearing a sound camera clicking and your screenshot will appear on your desktop in .PNG format, with the title Screen Shot [Date + Time].
8.Now the part of screen you want to capture has been saved, double click on the screenshot to open and share it with Preview.
How to Screenshot a Specific Mac App Window
1.Open the app and window you want to screenshot.
2.Press Command + Shift + 4 on your keyboard at the same time, then your cursor will turn into crosshairs.
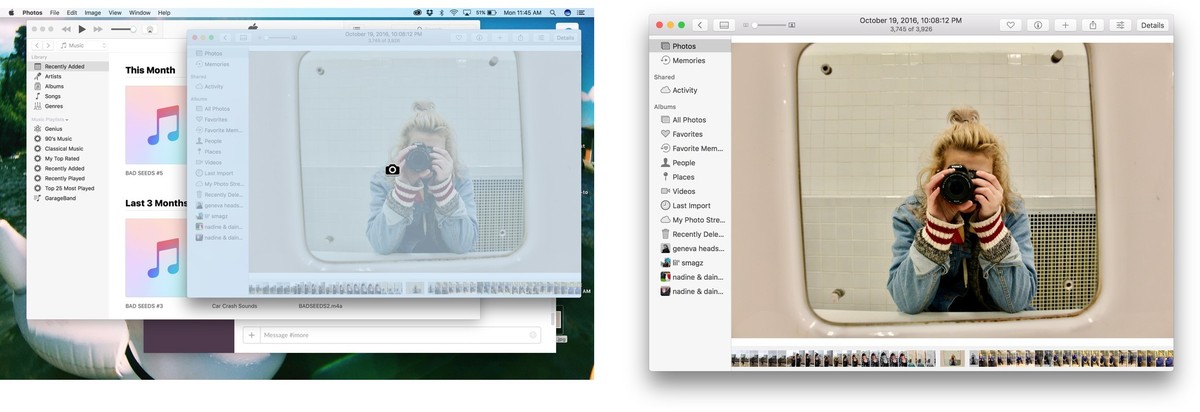
3.Press the Spacebar. Your cursor will surely turn into a camera icon.
4.Place the camera cursor on top of the window where you want to screenshot. The window will change to blue so you can make sure it’s the right one.
5.Click your mouse or trackpad to take the screenshot.
6.After hearing a sound camera clicking and your screenshot will appear on your desktop in .PNG format, with the title Screen Shot [Date + Time].
7.Now a specific Mac App window has been captured by you, double click on the screenshot to open and share it with Preview.
How to Save a Screenshot Directly to Your Mac Clipboard
1.Open your screenshot exactly as you would like capture.
2.Press Command + Shift + Control + 3 meanwhile to screenshot the whole screen to your Clipboard.
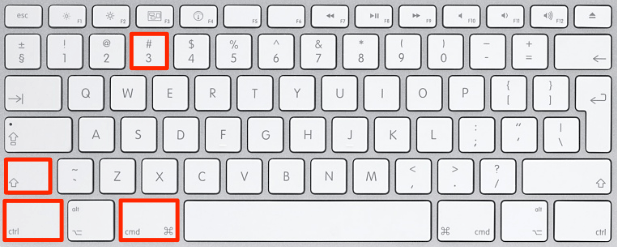
3.Press Command + Shift + Control + 4 on your keyboard at the same time to screenshot an area, or press Spacebar afterwards to cut a specific window, save to your Clipboard.
4.Go to your document or image editor of choice and use Control + v or choose Paste manually from the menu to copy your screenshot out of the Clipboard and into the window.

Above four ways to screenshot on Mac, I think it should help you a lot, no matter you have known for one way or other, now you can capture the screen whatever you like.
More ways to capture screen on Mac is updating…
Recent posts
- iOS 12.2 Beta Doesn’t Support Face ID to Next-Gen iPad, References new iPod Touch 7
- Facebook COO Admits that the Company has Trapped into Trouble, Says ‘We Need to Do Better’
- Apple Replaced Batteries for 11 Million iPhone last year, Far More than Expected
- OnLeaks Releases the Early Renders of New iPhone for 2019
- Apple Responds to Reports of Bent iPad Pros: “Tighter than Previous Generations”
Archives
- January 2019
- December 2018
- November 2018
- October 2018
- September 2018
- August 2018
- July 2018
- June 2018
- May 2018
- April 2018
- March 2018
- February 2018
- January 2018
- December 2017
- November 2017
- October 2017
- September 2017
- August 2017
- July 2017
- June 2017
- May 2017
- April 2017
- March 2017
- February 2017
- January 2017
- December 2016
- November 2016
- October 2016
- September 2016
- August 2016
Categories
- Apple
- Apple Battery Replacement
- Apple Music
- Apple News
- Apple September Event
- Apple Watch
- Cambridge Analytica Data Scandal
- Global Mobile App
- HomePod
- How-to-Guide
- Howto Guides
- iOS
- iOS Security Guide
- iPad
- iPhone X
- iPhone XS
- IT News
- Mac App Uninstall
- Mac News
- Mac Tools
- MacBook Air
- Mobile World Congress 2018
- News
- Samsung Galaxy
- Samsung Galaxy Note
- Toshiba
- Tumblr
- Uncategorized
- Use Tips for Mac
- World News
- WWDC 2018
Comments